Considerations when making up a slurry
Introduction
This article outlines the considerations and factors effecting slurry make up and management. There are many factors to consider when assessing the make up of your slurry.
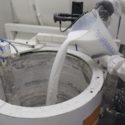
The goal of mixing a new slurry is to disperse the refractory particle homogeneously into the binder without disturbing the colloidal chemistry by introducing excess heat or contaminants.
A slurry is “wet out” when the viscosity of the material is consistent, the slurry has no bubbles, and all properties like %SiO2 and pH is within the assigned specifications. Shown in figure 1 is an example of the slurry wetting out and stabilising after the slurry has wet in.
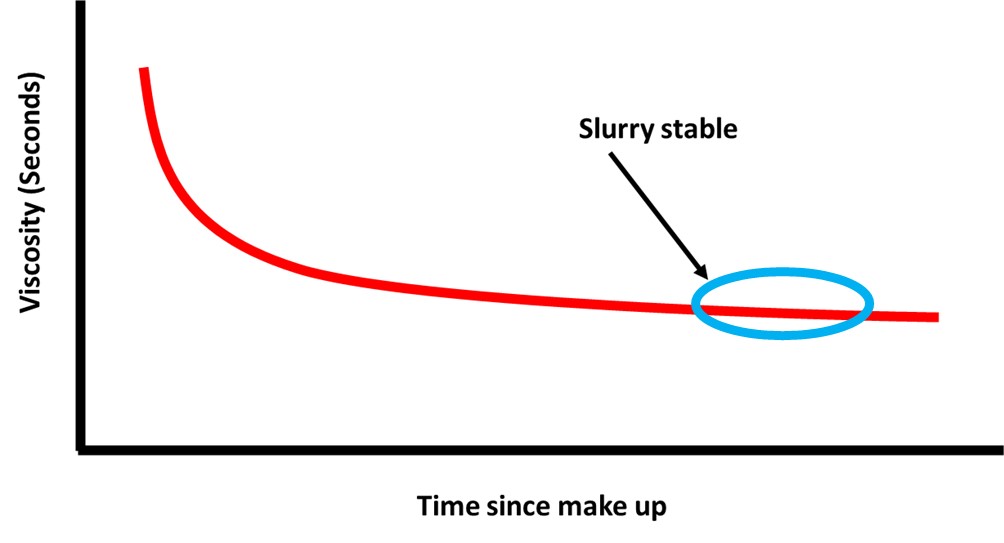
Figure 1 Viscosity versus time of a slurry
Equipment
The equipment used can have a big influence on the wet in performance of a premix. Below are some options in order of efficiency:
- Slurry tank – This is the longest and least efficient method of mixing. Without further agitation, clumps may take many days break up and form a smooth creamy mixture.
- Barrel roller – This method, depending on geometry and RPM, can be an effective method of mixing. It is particularly useful for small batches or expensive raw materials which are only applied to the prime layer.
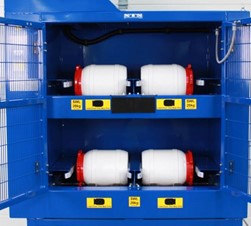
Figure 2Barrel rollers for smaller slurry mixing and storage
- Propeller mixer – this is the most common method of premixing a slurry. A propellor mixer, coupled with a standard rotating slurry tank helps to mix the slurry fast and efficiently and break up any large clumps. These mixers typically have a speed between 200-300RPM.

Figure 3 Premix tank with integrated propellor mixer for premixing slurries
- High shear mixing – Finally, high shear mixing is also a consideration when preparing a slurry. This method again may be coupled with a rotating tank. These are typically saw tooth mixer which RPM speeds of 500 to 5,000 RPM. They have the benefit of mixing very efficiently, however they should be closely monitored for the following issues:
- Temperature – The energy imparted into the slurry can cause a large increase in temperature within the slurry which should be allowed to return to room temperature before dipping
- Bubbles – Depending on the vortex created by the mixing head, there is a tendency fore air to be introduced in the Again, once the high shear is removed, there may need to be a period of “stabilisation” while the air bubbles escape from the mixture
- Polymer breakdown – Finally, the presence of a high shear mixing in a polymer enhanced slurry should be closely monitored. If the mixing is too vigorous, there is a risk the polymer, and its bonding properties are compromised. While this is not always the case, it should be monitored and understood within the shell room.
Considerations
Is my method safe?
Before beginning any operation, one must ensure the process is safe. In the proximity of rotating equipment like mixing and propellor mixers, care must be taken to ensure there are no loose clothing or employee lanyards which could get caught in the machinery.
Secondly, some materials used within the binder can be hazardous, and therefore may require PPE like gloves while handling the binders. It is suggested to consult the associated SDS for more information. All product SDSs should be available from your supplier in all local languages.
Lastly, the refractory may also have respiratory hazards arising from the use of silicas and the small particle size of the flours. These risks can be reduced using respiratory PPE equipment and extraction in the area. Once again it is suggested to consult the SDS and local regulations regarding this handling.

Is my equipment clean and operational?
The first item you need to consider is the equipment. In some foundries, pre-mix tanks and propellors are only use periodically, perhaps every month or so. It is therefore very important to ensure it is clean and functional. A thorough clean should be conducted after the tank is emptied so it is ready for the next slurry. If there is a worry about contamination or bacteria build up, a spray bottle of DI water & biocide can be used to ensure the tank and paddles are sterile.
Lastly, slurries are typically made up via buckets or transfer pumps from drums/IBCs. It is important these are also clean and sterile and the equipment used to measure these out are calibrated. We would suggest to always make a slurry based on weight of binder weight out rather than by volume. Flours can typically be added by number of bags until a fraction of a bag is needed for the final addition.
Is my formula correct to give me the correct recipe?
Next, we need to ensure the formula we have will give us the correct final properties for the slurry. If only a half tank of material is needed, check and double check the associated adjustments to be made to the final recipe.
If a new binder or refractory is to be used, we would suggest talking to your supplier to advise on the correct formula for the slurry. Even after you receive a new recipe, it is advised to mix up 75% of the total material required. This will allow for any finer adjustments to be made to the tank before it is full. If the tank is full and further adjustment is needed, new material will have to be disposed of to make space for the required adjustment, leading to excess waste.
Have I got enough material to make up the slurry?
While it may seem trivial, it has happened on many occasions where there has been insufficient stock of materials to finish the slurry. A simple calculation of the proposed density versus the volume of the tank will allow for a reduction in these stocking errors.
Slurry make up procedure
Make up slurry based on the approved or suggested formulation. First add the liquid components to the tank. This can be added as a pre-blended binder or as the various constituent parts.
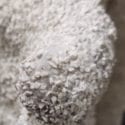
The flour is then slowly being added. It is important to make sure the flour is added slowly to reduce clumping. Fused silicas and aluminosilicates tend to clump which will extend the overall wetting time of the slurry. REMET would recommend a minimum of 5 minutes per bag of flour.
- Allow at least 24 hours for the slurry to be fully wetted in before using.
- Bubbles will appear during the mixing of the slurry as the air escapes from the refractory wetting out. This is completely normal and nothing should be completed.
- Additional antifoam can be added if bubbles are observed after 12 -24 hours. If excess foam is observed, add antifoam in slow increments. 10ml of Burst® 100 should be mixed with 100ml DI water and added to the slurry.
- Adjust slurry viscosity as required to suit the required application. This should be measured and confirmed to be stable before dipping commences.
Summary
If there are any further questions, please do not hesitate to contact your sales representative or REMET® technical team.
Disclaimer
Information and/or recommendations based on information received are believed to be reliable. Offered free of charge for use by persons with technical skills, at their own discretion and risk, without guarantee of accuracy REMET makes no warranties, express or implied, and assumes no liability as to the use of its products or of any information pertaining thereto.
< Back to insights